Gallery

Patterns

Crochet Basics


")
Rainbow Coaster

EGGCAT
Puniko

Coming soon...
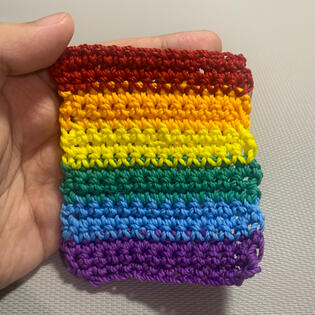
Rainbow Coaster

A simple coaster for practice and a nice addition to your room~
I am using Onitsuga Polycherry yarn for this project. The coaster will be made from bottom up.
Free PDF available!
Tools and Materials:
- Six (6) colors in DK Weight, 100% Polyester.
--Color used: Red, Orange, Yellow, Green, Blue and Purple Yarns (or any color of your choosing)
- Crochet hook size 4.5mm (or as recommended for yarns of your choosing)
- Tapestry needle
- Scissor
Abbreviations:
- ch = Chain
- sc = Single Crochet
Pattern:
Row 1 (in Purple): make a slip knot, ch 15 (15)
Row 2: ch 1, sc on 2nd ch from hook, sc on each stitches until end of row (15)
Row 3: ch 1, turn work, sc on the same stitch. sc until end of row (15)
Row 4: ch 1, turn work, sc on the same stitch. sc 14, change color to Blue on last sc (15)Row 5 (in Blue): ch 1, turn work, sc on each stitches until end of row (15)
Row 6: ch 1, turn work, sc on the same stitch. Sc until end of row (15)
Row 7: ch 1, turn work, sc on the same stitch. sc 14, change color to Green on last sc (15)Row 8 (in Green): ch 1, turn work, sc on each stitches until end of row (15)
Row 9: ch 1, turn work, sc on the same stitch. Sc until end of row (15)
Row 10: ch 1, turn work, sc on the same stitch. sc 14, change color to Yellow on last sc (15)Row 11 (in Yellow): ch 1, turn work, sc on each stitches until end of row (15)
Row 12: ch 1, turn work, sc on the same stitch. Sc until end of row (15)
Row 13: ch 1, turn work, sc on the same stitch. sc 14, change color to Orange on last sc (15)Row 14 (in Orange): ch 1, turn work, sc on each stitches until end of row (15)
Row 15: ch 1, turn work, sc on the same stitch. Sc until end of row (15)
Row 16: ch 1, turn work, sc on the same stitch. sc 14, change color to Red on last sc (15)Row 17 (in Red): ch 1, turn work, sc on each stitches until end of row (15)
Row 18: ch 1, turn work, sc on the same stitch. Sc until end of row (15)
Row 19: ch 1, turn work, sc on the same stitch. Sc until last stitch, cut yarn and fasten offWeave in loose ends and you're done!
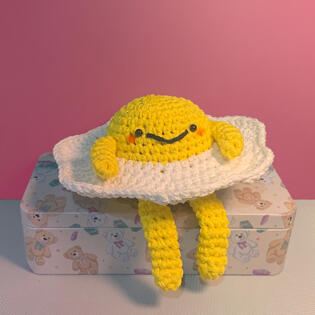
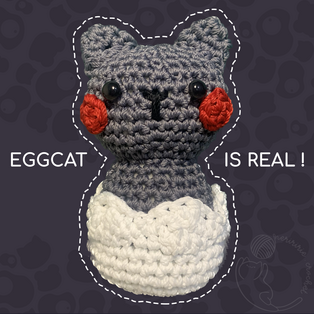
Neririe’s EGGCAT (Anniversary Edition)

To celebrate my birthday and stream anniversary (12 March), I decided to make my mascot as an amigurumi!. This pattern is worked continuously in rounds from eggshell to top of head, while the ears and cheeks need to be sewed on the head.I am using Onitsuga Polycherry yarn, 2 strands held together for this project.Pattern available as PDF on Ravelry or "Pay What You Want" on Ko-fiDifficulty: Beginner-Intermediate
Tools and Materials:
- Three (3) colors in DK Weight, 100% Polyester.
--Color used: Grey, White and Red
- Crochet hook size 4mm (or depending on yarn that you use)
- Tapestry needle
- Scissor
Abbreviations:
- mr : Magic Ring
- sc : Single Crochet
- inc : Increase
- dec: Decrease
- hdc : Half Double Crochet
- dc : Double Crochet
- tr : Triple/Treble Crochet
- sl st : Slip Stitch
- FLO : Front Loop Only
- BLO : Back Loop Only
IMPORTANT:
This pattern may not be distributed, edited or sold in any way. Please link back to Neririe’s Atelier. You may not sell the finished product, but you can gift it to someone else as long as it is non-profit. Please tag me on Instagram (@neriririe.crochet) and add #neriririeEGGCAT hashtag.I hope you like your own little eggcat!
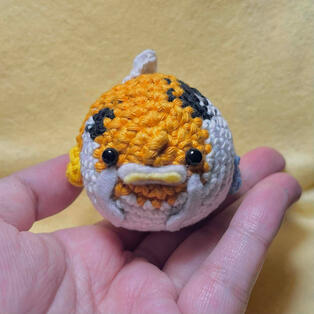
Puniko Fan-made Pattern by Neririe

Since COVER corp. has stopped making merchandise for HOLOSTARS (Japan and English), there has been an increased demand for fanmade and/or DIY merch. As a new Koipanion who recently joined the pond, I missed out on Josuiji Shinri’s merchandise. I have always loved and adored Shinri’s mascot, Puniko, and have decided to take the challenge of making my own Puniko based on photos and references available online. Now that I have completed my own Puniko and written my pattern, you too can make your own Puniko. You can change the color pattern yourself to customize your own Puniko, but I hope this pattern can give you a general guideline.This Puniko was made with “United by Cotton” yarn in the color White, Orange, Black, Yellow and Blue with a 3.5mm hook. The pattern is written in US pattern terminology and will take about 1-2 hours depending on work speed. The writer’s Puniko is about 6cm wide, 8cm long and 6cm tall. Feel free to change yarn and hook sizes to make different sized Punikos.While this pattern is free and non-profit, please refrain from resharing or reselling this pattern anywhere and please link back to my Carrd or Ko-fi if you’re sharing this around. Thank you!Difficulty: Beginner-IntermediatePattern available here on Carrd or as PDF on Ko-fi
Tools and Materials:
- Yarn in White, Orange, Black, Yellow and Blue in Fingering size (or bigger)
- 3.5mm crochet hook (or biggest)
- Stitch marker
- A pair of safety eyes (or Black felt cut in circle shape)
- Felt fabric in White and Yellow
- Glue to secure safety eyes and stick the felt fabric
- Darning needle to sew parts to the body.
Abbreviations:
- mr: Magic Ring
- sc: Single Crochet
- inc: Increase
- dec: decrease
- hdc: Half Double Crochet
- dc: Double Crochet
- tr: Triple/Treble Crochet
- sl st: Slip Stitch
IMPORTANT:
This pattern may not be distributed, edited or sold in any way. Please link back to Neririe’s Atelier. You may not sell the finished product, but you can gift it to someone else as long as it is non-profit. Please tag me on Instagram (@neriririe). Feel free to tag it with Josuiji Shinri's art tag (#JosuijiArt) so he can see more crochet Puniko swimming around the netI hope you like your own little Puniko!
Body
1. (orange) mr 6 (6)
2. (orange) (inc) x6) (12)
3. (orange) (sc, inc)x6) (18)
4. (orange) (inc, 2sc)x3, (white) (inc, 2sc)x3 (24)
5. (black) 3sc, (orange) inc 2sc, (black) sc inc, (white) (3sc inc)x4 (30)6. (black) inc sc, (orange) 3sc inc 2sc, (black) 2sc, (white) (inc 4sc)x4 (36)
7. (white) 2sc, (black) 3sc, (orange) 6sc, (white) 24sc (36)
8. (white) 2sc, (black) 3sc, (orange) 10sc, (white) 21sc (36)
9. (white) 3sc, (black) 2sc, (orange) 11sc, (white) 20sc (36)
10. (white) 4sc, (orange) 11sc, (white), 21sc (36)11. (white) 5sc, (orange) 9sc, (white) 22sc (36)
12. (orange) 3sc, (white) 2sc, (orange) 8sc, (white) 10sc, (orange) 2sc, (white) 9sc (orange) 2sc (36)
13. (orange) 3sc, (white) 4sc, (orange) 5sc, (white) 10sc, (orange) 4sc, (white) 6sc, (orange) 4sc (36)
14. (orange) 2sc, (white) 5sc, (orange) 5sc, (white) 11sc, (orange) 2sc, (white) 7sc, (orange) 4sc (36)
15. (orange) sc, (white) 5sc, (orange) 5sc, (white) 21sc, (orange) 2sc, (black) 2sc (36)16. (black) 2sc, (white) 3sc, (orange) 5sc, (white) 25sc, (orange) sc (36)
17. (orange) dec, (white) 3sc, (orange) sc dec sc, (white) 3sc (dec 4sc)x4 (30)
18. (white) 2sc dec, (orange) 2sc, (white) 2sc dec (3sc dec)x4 (24)
19. (white) (dec 2sc)x6 (18)
20. (white) (sc dec)x6 (12)21. (white) (dec)x6 (6)
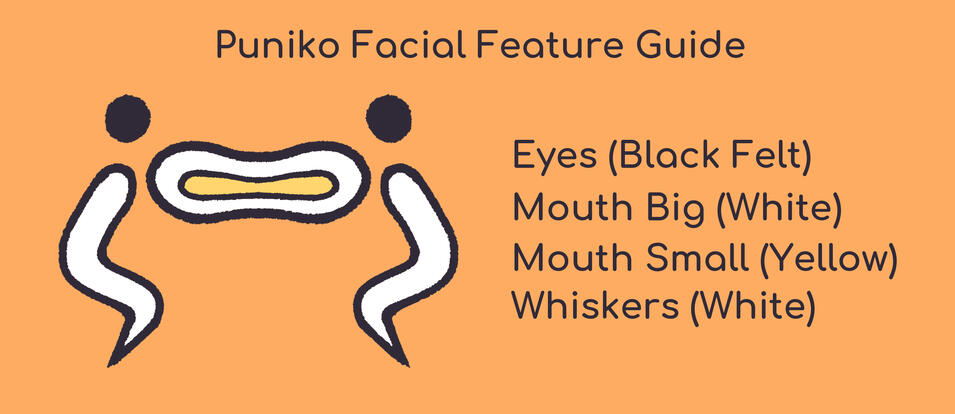
FO, secure yarn into bodyPlace safety eyes between round 3 and 4, about 4 stitches apart.
Cut white and yellow felt in the shape of Puniko’s mouth, and glue it in between the eyes.
Cut 2 pieces of white felt in the shape of Puniko’s whiskers, and glue it under its eyes.Tail (in white)
1. ch 4
2. (hdc dc hdc) into 2nd loop from hook, sl st to 3rd loop, (dc tc dc, sl st) into 4th loop
FO, sew tail into the back side of bodyDorsal Fin (in white)
1. ch 8
2. sc into 2nd loop from hook, 2 sc, hdc, tr, dc, sc
FO, sew dorsal fin into the upper side of the body, on round 9 to 15Yellow (left when looking at Puniko's face) / Blue (right when looking at Puniko's face) Fins
1. ch 4
2. hdc on 2nd loop from hook, dc, hdc
3. turn work. sc, hdc, sc
FO, sew fin(s) to side of body accordingly on round 10 to 14.
Visual Aid for Facial Feature from Felt Fabric
Visual Aid for Fin Placements

